Pages
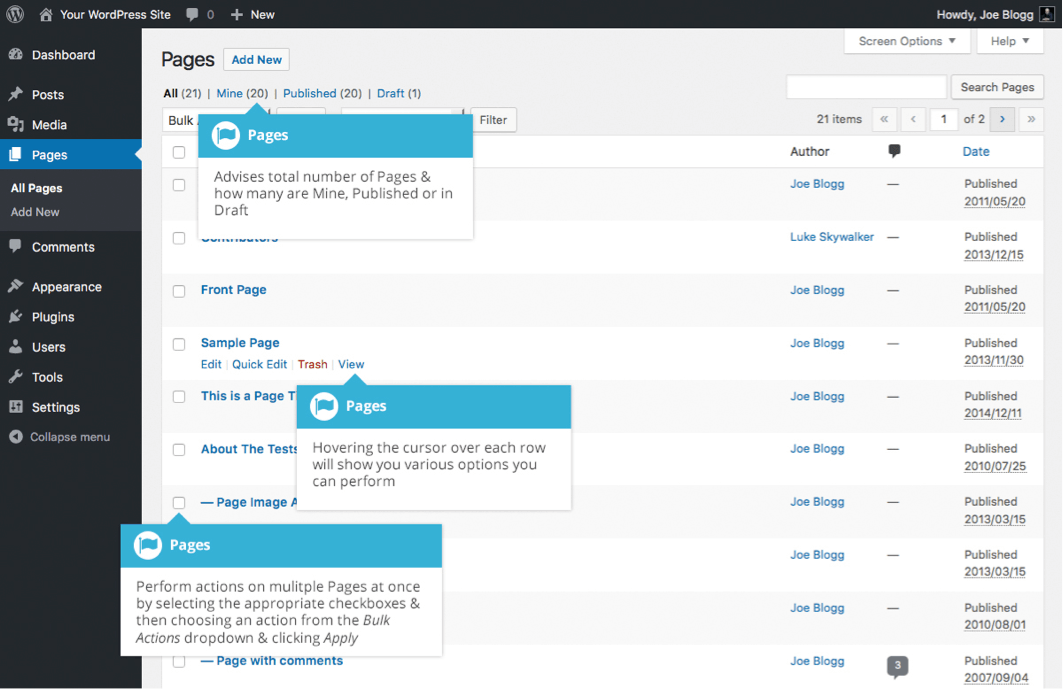
WordPress is built around two basic concepts. Posts and Pages. Posts are typically blog entries. A series of articles, listed (usually) reverse-chronologically. Pages are used for more static content (i.e. content that doesn’t change or changes infrequently). An ‘About us’ page is an example of a Page on a typical website. In most cases you’ll find that the content in the ‘About us’ page doesn’t change all that frequently.At the top of the page you can view how many Pages in total you have in your site, how many have been published by yourself or how many are Published or in Draft.
When hovering your cursor over each row, a few links will appear beneath the Page title.
- Edit – Will allow you to edit your Page. This is the same as clicking on the Page title
- Quick Edit – Allows you to edit basic Page information such as Title, Slug, Date plus a few other options
- Trash – Will send the Page to the Trash. Once the Trash is emptied, the page is deleted
- View – Displays the Page. If the Page hasn’t been published yet, this will say Preview
Next to each Page title is a checkbox. This allows you to perform an action on multiple items at once. You simply check the Pages that you would like to affect and then from the Bulk Actions dropdown select either the Edit option or the Move to Trash option and then click the Apply button. The Edit option will allow you to edit the Author, Parent, Template, whether to allow Comments or not and the Status of each of the checked items. The Move to Trash option will move the selected items to the Trash.
You can also filter the pages that are displayed using the dropdown list and the Filter button.
Adding a New Page
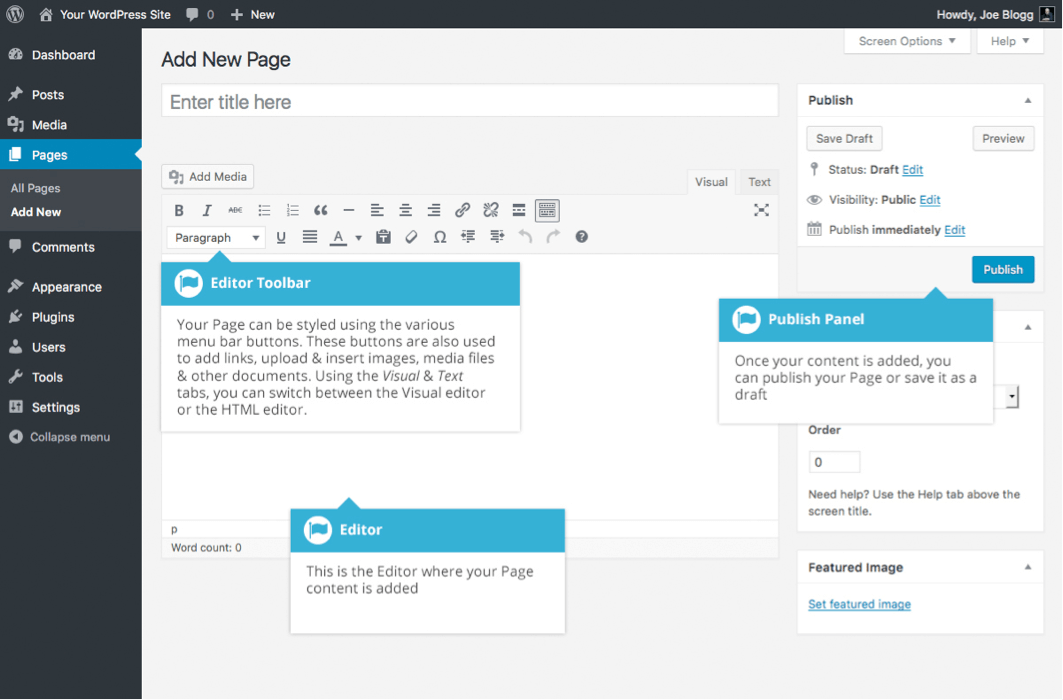
To add a new Page, hover your cursor over the Pages menu option in the left-hand navigation menu and in the fly-out menu, click the Add New link. Alternatively, click the Pages menu option and then click the Add New link underneath, or the Add New button at the top of the page. You will be presented with a page similar to the image below.


