Website Layout Support & Documentations
Welcome to Lollipop Creative Studio.
On this page you will find everything you need to install your website templates.
You will need to have a Wordpress installed in your hosting, with the Divi theme that you can purchase here.
If you have any technical problems with these layout, please do not hesitate to submit a ticket.
We are here to help you use and customise your layouts but for any issues relating to general usage of your parent theme, please contact Elegant Theme directly. to go straight to the experts and contact them directly. All of them offer good support and excellent documentation, which you can find links to below.
If you have a general hosting or WordPress issue, then do contact your host first to see if they can resolve the problem.
01
Start here – divi documentation
In this section we will help you get started with the Divi theme, from installation through finding your way around and getting further information and help. The Divi documentation from Elegant Themes is impressive and very easy to follow.
If you haven’t used Divi at all before, we recommend starting right here.
Your Title Goes Here
Elegant Themes has comprehensive Divi Theme Documentation, with sections on Basics, Modules, Library, Theme and Module Customizers and Additional Features.
If you don’t find what you need there, check out their Divi Support Forum in the members area, where you can open a ticket if you haven’t find the answer you’re looking for.
Keep an eye on the Elegant Themes blog with its Divi Resources tag.
Divi Nation is the podcast to tune in to for curious interesting and downright brilliant Divi talk.
There is also the very fabulous Divi Theme Users Facebook group which you can join to see and take part in knowledge sharing and discussion.
DIVI DOCUMENTATION
Elegant Themes has comprehensive Divi Theme Documentation, with sections on Basics, Modules, Library, Theme and Module Customizers and Additional Features.
If you don’t find what you need there, check out their Divi Support Forum in the members area, where you can open a ticket if you haven’t find the answer you’re looking for.
Installing Divi
Follow this Divi installation video by Elegant Themes.
Divi Basics
If you’re new to Divi, we strongly advise watching the introductory video by Elegant Themes, which provides insights into the Divi Builder and helps you grasp the fundamental principles of this page builder.
The Divi Builder is remarkably intuitive to work with, allowing you to dive in and learn as you go. However, for those seeking additional guidance, the Elegant Themes Divi Documentation’s Divi Basics section offers excellent walkthroughs that provide a comprehensive overview.
Using Divi classic Editor
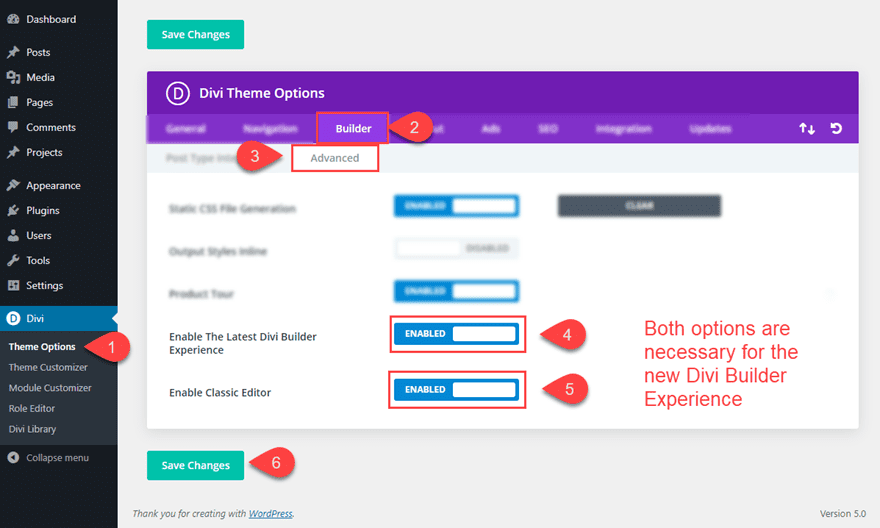
In order to access the new Divi Builder on the backend, all it takes is a few clicks.
From your WordPress Dashboard, navigate to Divi > Theme Options. Once there, click the Builder tab. Under the Builder options, click the Advanced tab.
There you will find the options to enable the latest Divi Builder experience and to enable the Classic (WordPress) Editor.
You will need to enable both of these options to enjoy the new Divi Builder on the backend. Then click Save Changes.
02
Working with Lay outs
Importing Layouts
Individual layouts
Lay out packs through library
Extracting your templates
Extract your purchased templates In it you will find:
- Layout Pack (all lay outs in one file) + Global Preset Style Guide
- Divi Theme Builder Files (this includes your header/footer and blog post, search, and 404 page)
The files are in compatible JSON files so you won’t be able to read it (just yet).
Importing template layouts to Divi Library
The best way to add these layouts is to import them into the Divi Library first. Then, when creating a new page, you can add the new layout from your library.
Before you add the layouts to your website, you need to download the layout pack and unzip the file.
From your WordPress Dashboard, go to Divi > Divi Library and click the Import & Export button at the top left of the page.
In the portability modal that pops up, select the import tab and click choose file. Find the unzipped layout pack folder and select the json file named “Layout Pack” in the filename. This will upload all of the layouts to your library at once, instead of having to do each of them individually.
IMPORTANT:
You can choose whether or not to include presets by ticking the include presets checkbox. If you want to keep all the global presets from the layouts, make sure you tick this option.

Adding template layouts to new pages
Once you copied the layouts to Divi Library, this process is pretty straightforward.
From your WordPress Dashboard, go to Pages > Add New.
Enter the Title of the page you need to create. Click to use the Divi Builder and choose a Premade Template
In the Load from Library modal that pops up, click the “Your Saved Layouts” tab and select the new layout from the list to load the new layout.
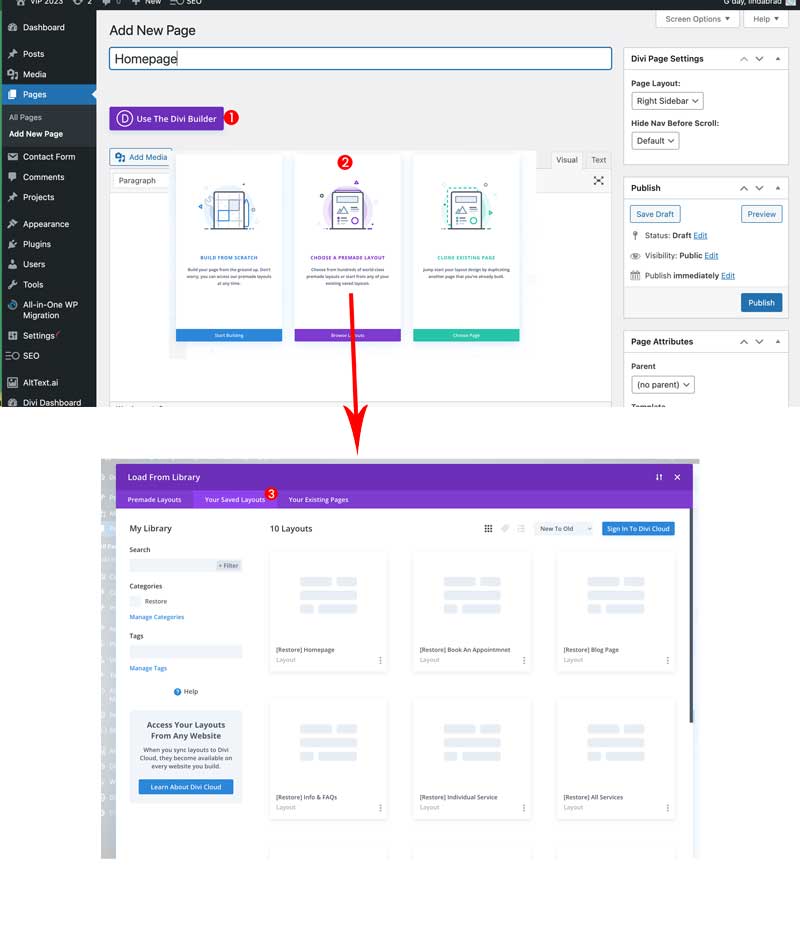
You can then edit the content via the back end or through the visual builder.
Repeat this process for each new page, adding a new layout to each one.
You can watch more about Layouts Portability here.
Importing Divi theme builder files (inc. header/footer)
Your layout packs also include
- global header/footer
- global blog post template
- 404 page
- search result template
To install them on your website, follow these instructions:
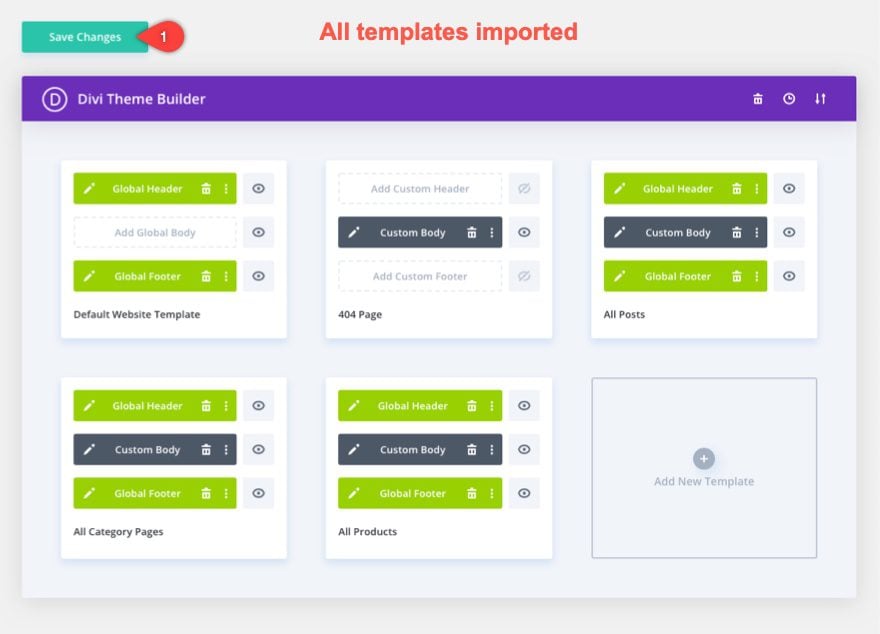
How to Import Templates using the Divi Theme Builder
To import templates to your site, you will need to have the right file to import. This file is in json format and will be generated upon a successful export of one or more Theme Builder templates. The json file could contain a single template or multiple templates (including a default website template) all in one single file.
Tips: to make it easier for you, we have the file containing multiple templates in one file. You can find it in the folder called Divi Theme Builder in your template files.
To import the json file using the Divi Theme Builder, you will navigate to the same portability options within the Theme Builder by clicking the portability icon at the top right of the page.
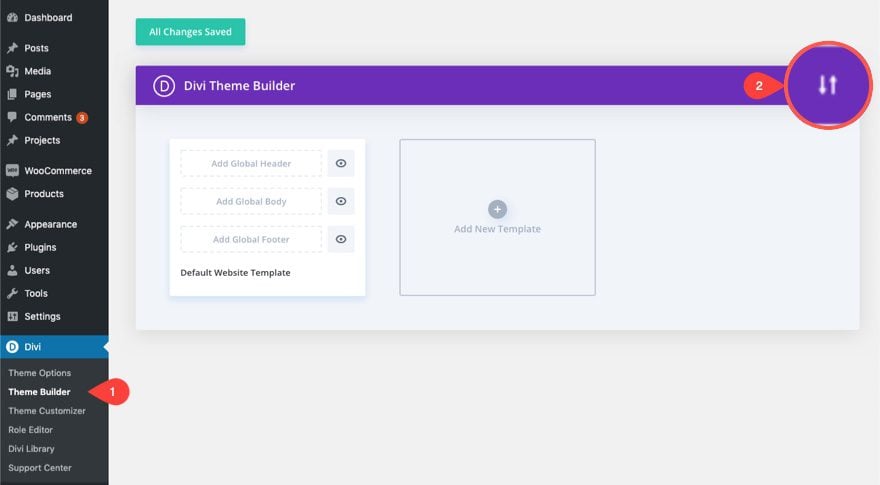
Then select the Import Tab.
Choose the file called “Divi Theme Builder’ from your download
If you are importing templates to an empty theme builder, the options don’t apply so you can leave them checked.
After that, click the import button.
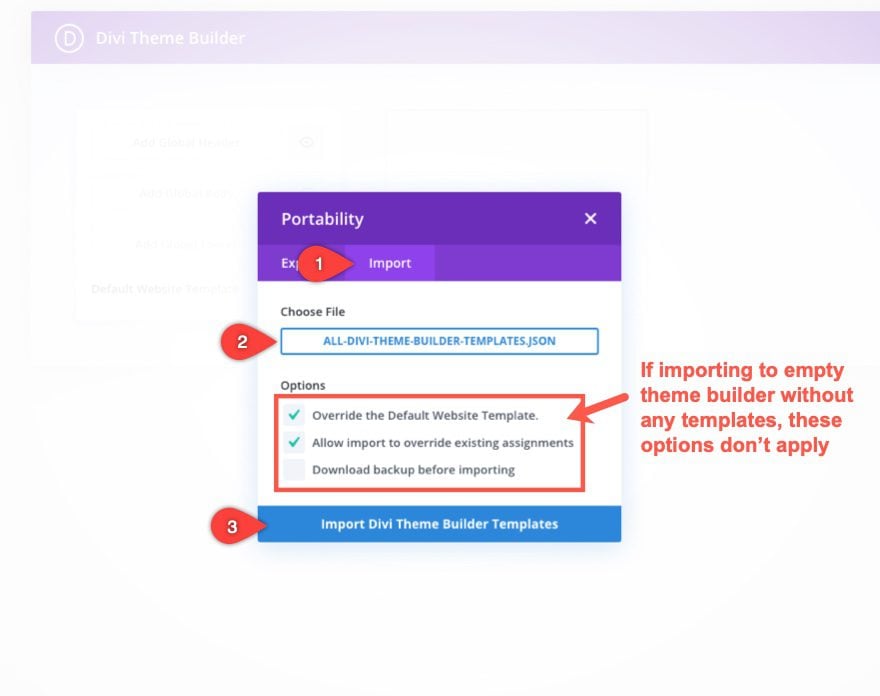
That’s it! All the templates contained in the file will be magically imported to your website with all the Global areas and assignments in place. All you have to do now is click to save changes.
03
Personalised your website
If you have used Divi before, you’ll know there are a few ways to personalise your website. This sections show how we recommend using our templates & layout packs efficiently.
divi theme Customiser
Individual layouts
Lay out packs through library
Wordpress Setting
On the dashboard, go to Settings and take a look around the settings areas. There are a couple of things you will want to get configured right away.
Go to Settings > Reading.
- In the Front page displays area select A static page. Set the Front page to be HOME or whatever name you’ve given the page you want people to land on first.
- If you are planning to use the included blog layout, leave the Posts page as -Select- and click the blue Save Changes button before you move on.
click the blue Save Changes button before you move on

Divi Theme Customiser
We will be using Global Presets in the next steps but there are a few things that we like to set up on the Theme Customiser.
Go to Divi > Theme Customizer
General Setting:
- Site Identity: Add your Site title, tagline and site icon
- Layout setting; you can keep most of them as it is but make sure you change the theme accent colour to your branding colour
- Typograpy: Set up the default fonts with the font that you would like to ue. We will be using global preset but the fonts in this section act as fallback.
- Background: leave as default unless if you’d like to have a colour as your website background.
Button: You can leave these as default as we will be using Global presets.
Blog: You can leave these as default as we will be using Divi theme builder.
Typically we can leave the rest as default too.
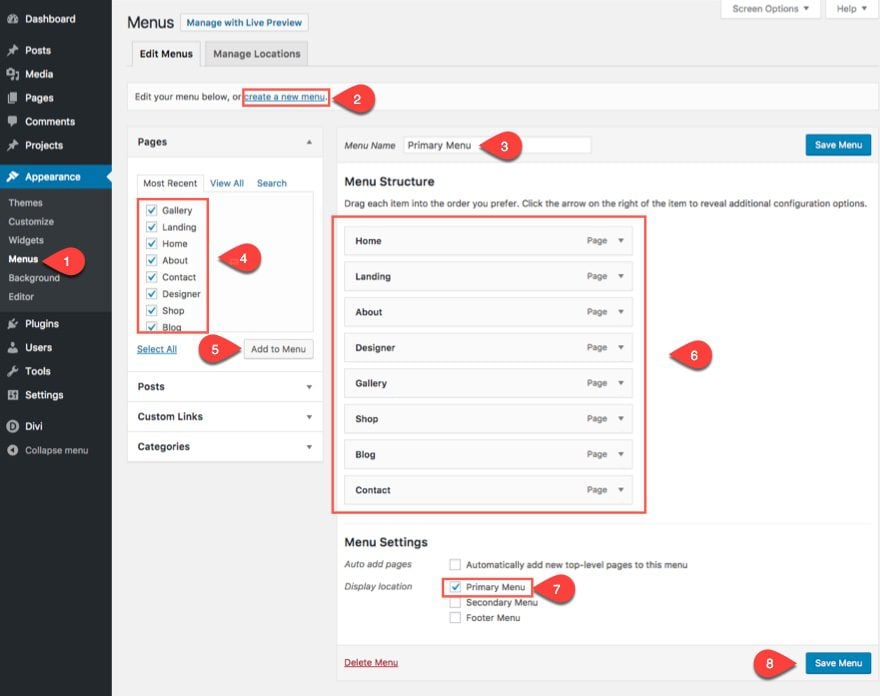
Creating your primary menu
If this is a new install, you will start to see all your new pages in your primary menu bar in the top header. This is because you don’t have a primary menu created yet so by default your menu will get populated by all pages and posts you add to your site.
To create your primary menu, go to the WordPress dashboard and do the following:
1. Navigate to Appearance > Menus.
2. Select the “Create a new menu” link at the top of the page.
3. Enter a menu name.
4. Select your menu items in the left toggle under Pages.
5. Click Add to Menu.
6. Organise your menu items by dragging them into place.
7. Under menu Settings at the bottom of the page, select “primary menu” as the display location.
8. Save menu.
Working with Images
Our recommended image sizes (longest side) are:
- Full width images: 1920px
- Gallery images :1200px
- Blog post images and images for central content: 1080px
- Blurb images: 400 x 600px
Tips: Make sure you have the same dimension for the images so they are aligned properly.
Working with fonts
There are a whole lot of ways to work with fonts in Divi, but let’s keep it as simple as possible.
- There is a large selection of native fonts that come along with Divi, which represent about 2/3 of the free Google Fonts selection. These are the fonts that appear on drop-down selection lists for fonts within Divi Builder.
- Custom fonts, not native to Divi, may be free or paid-for downloads. Google Fonts, Font Squirrel and Creative Market are all good sources. It is good practice to use only fonts which you have a license to use for the web.
- In the Special Features section we include a list of the fonts used in the demo for your template. Wherever possible we use Google fonts, which are free to download and use. Any non-native fonts you want to use will need to be installed as custom fonts.
UPLOADING CUSTOM FONTS
- Divi supports uploading of custom fonts and you can do this through any text module, via the font selector. Once uploaded the font will become available in all font selectors.
- Note. Many WordPress installs natively block the upload of custom fonts (and other file types that aren’t images). You can edit your WordPress functions.php file to temporarily allow font uploads. Once your font is uploaded, you should delete the script which might weaken your website security.This tutorial from Elegant Themes shows you how to do it.
Editing your header/footer
Go to the Theme Builder Options
Then, navigate to the Theme Builder in Divi’s Theme Options. Once there, you’ll notice the Global Header & Global Footer.
Click on the Global Header to make changes on the header, or Global Footer to make changes on the footer.
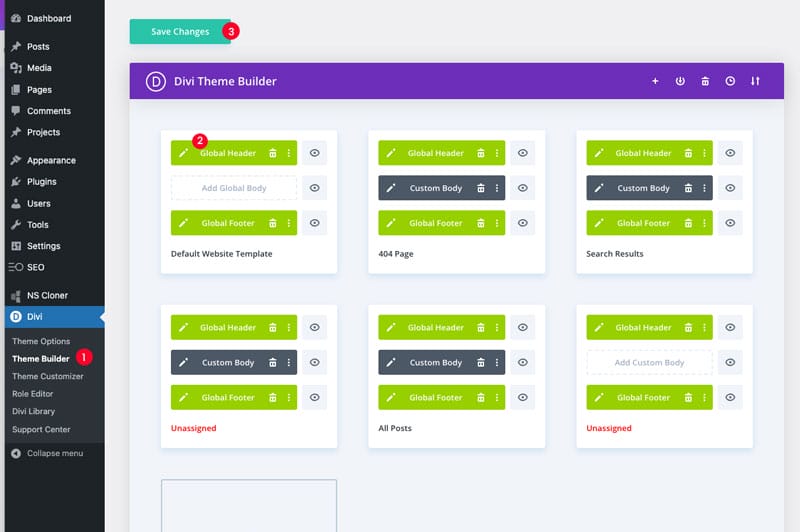
Make changes and click on Save Changes.
Creating New header/footer
If you already have Global Header/Footer there you can delete them by clicking the bin icons, or you might want to just edit them.
Otherwise please follow the instruction belo
Go to the Theme Builder Options
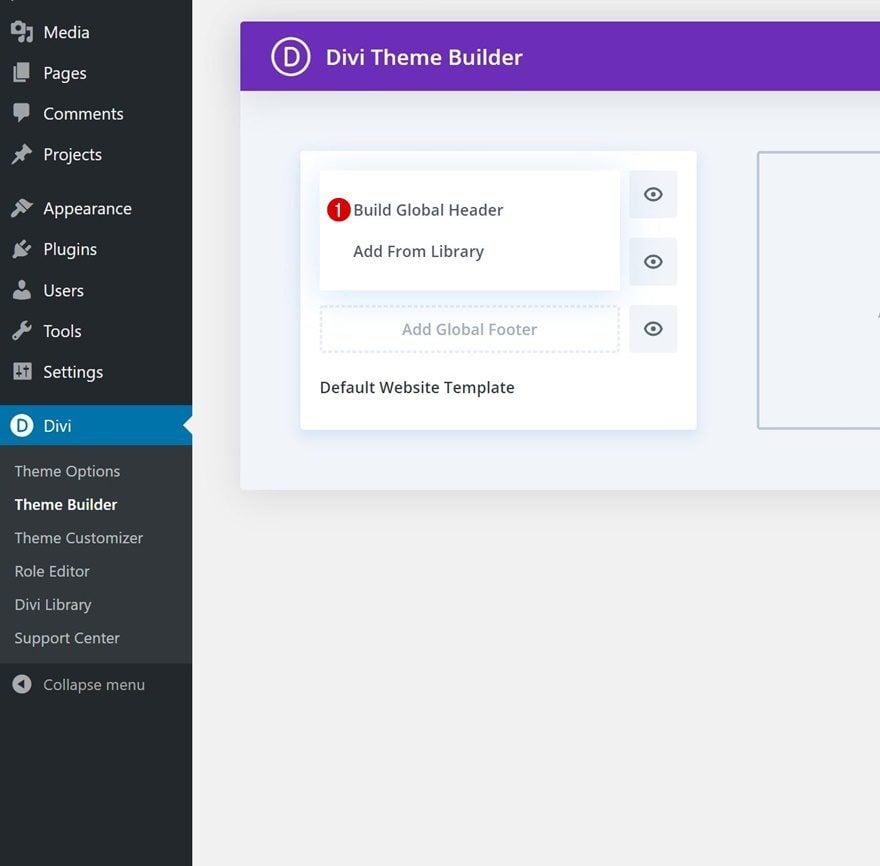
Then, navigate to the Theme Builder in Divi’s Theme Options. Once there, you’ll notice an empty default website template.
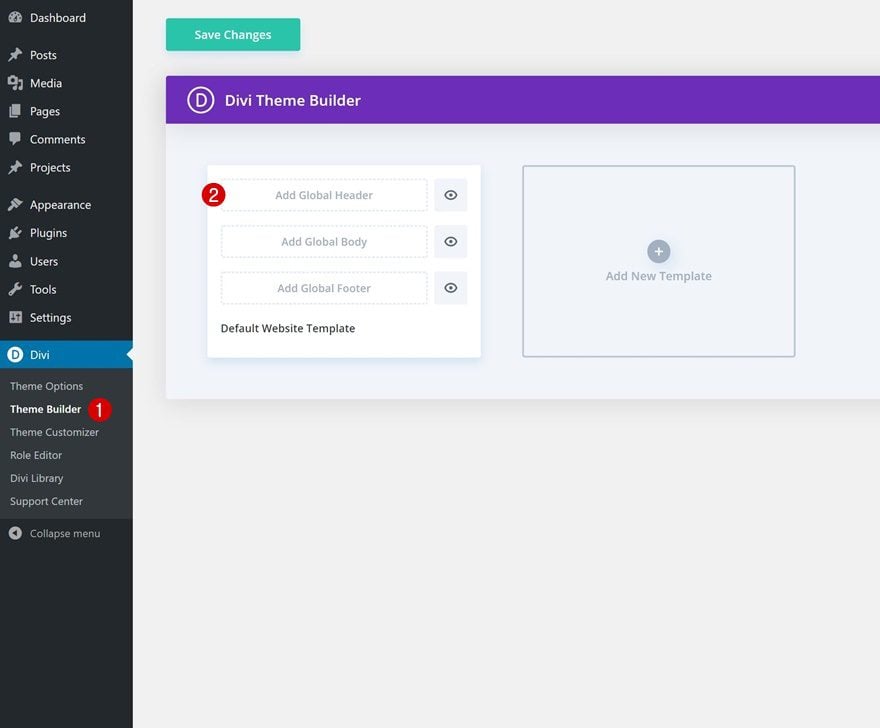
Add & Build Global Header
The default website template is where you can start creating your custom global header, global body and global footer.
Click on ‘Add Global Header’ and continue by clicking on ‘Build Global Header’ to get started with the process.
Follow the above instruction for Global footer.
Updating Menu on your header
Go to Theme Builder>Global Header
Click on the Menu module and refresh/change your menu.
04
Global Presets
Using Global Presets to set your brand fonts and colours throughout the website
divi theme Customiser
Individual layouts
Lay out packs through library
Divi Global Colours
All our layouts use Global Colours.
All elements using that colour are updated when you change a global colour. That means you control your entire website’s scheme from a single location while using the builder, adding and managing colours as you see fit.
See how to adjust your global colours on this Divi Global Colours.
Divi Global Presets
We use Global preset on colours, and fonts and other modules.
When you change a global preset, all elements using that preset are updated. That means you control your entire website’s scheme from a single location while using the builder, adding and managing modules as you see fit.
Learn about Global Presets here.
TIPS: Your layout pack also includes a Global Preset style guide so you can make all the global changes in one document.
See the next tab to learn how to use it.
Setting up a Global Preset Style Guide
A Global Preset Style Guide is an overview of the most important elements that you’ll be styling for use inside your Divi website. You will be able to control your entire website’s scheme from a single location, including global fonts, colours and all the modules we use for the template design.
You can override these modules individually if you have to.
Open your Global Preset Style Guide
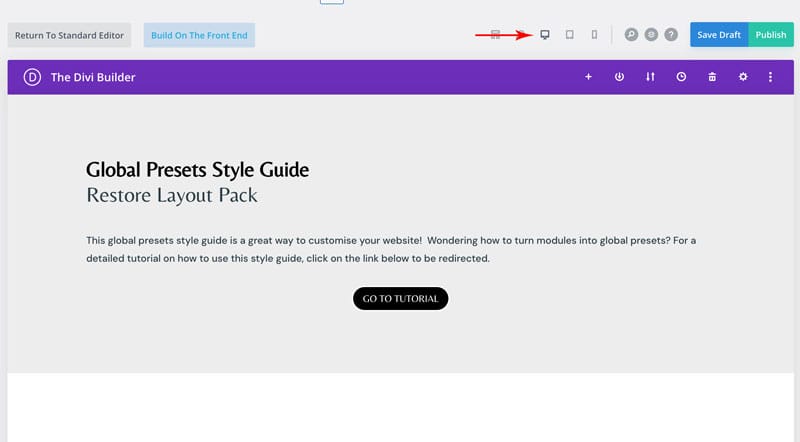
Once your layouts have been uploaded (see Importing layout packs & add them to the new pages), locate the Global Preset Styleguide layout inside Divi Library and click Edit.

Switch Over to Visual Builder
If you choose the layout editor, switch over to Visual Builder.
Now you will see all the presets we use for this layout packs.
Set up Color Palette on Global Colour Setting.
Once inside the style guide framework, you can set up the colour palette of your choice and replace the website colours with your branding colours.
To visually display the colours inside our style guide, we’re using the background settings of a Text Module. Open that Text Module, go to its background settings and click on Global.
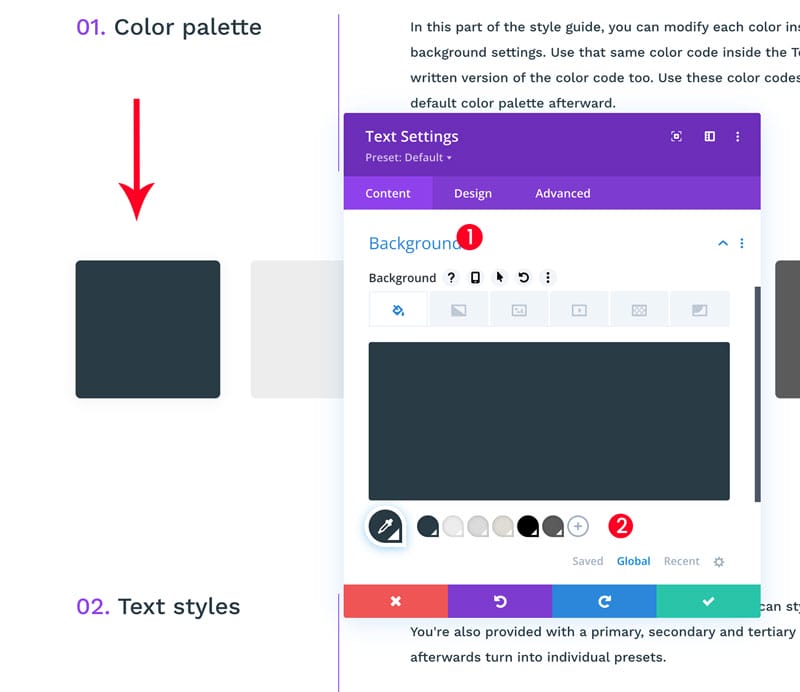
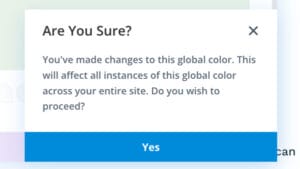
Change the global colour into your branding colours.
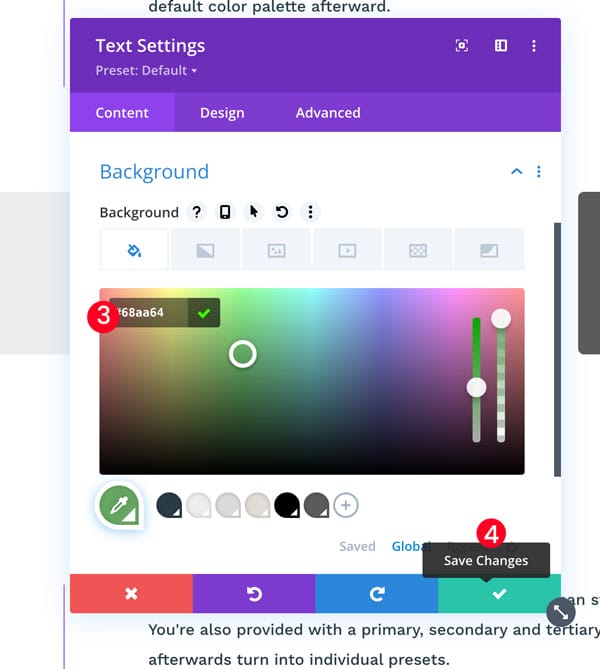
Please note that by changing the global colour will change it throughout the whole site.
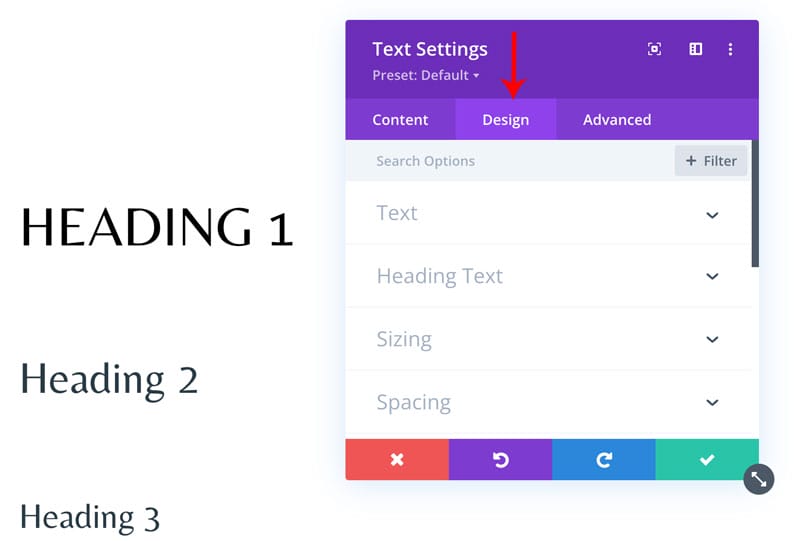
Now you can move to the Text setting and set the Headings and Body text with your fonts, sizes and colours.
To change this, click on the text module that shows all the headings, and go to the Design tab to make all the changes (don’t forget to also set the tablet and mobile version).
Once you finish, turn the module into Global Preset in Settings
Click on the preset option at the top.

The Preset Settings Dropdown Menu
Global Presets exist within the settings modal of any Divi element. To access the global presets for a specific Divi element, open the settings and click the preset dropdown menu at the top of the modal under the heading.
You can choose to make your primary module the default one too. Once you’ve created the global preset, make sure that that specific preset is selected for the module, this will help you import and export global presets using the style guide layout.

Within the dropdown, you will have the option to create a new preset or update the current default preset
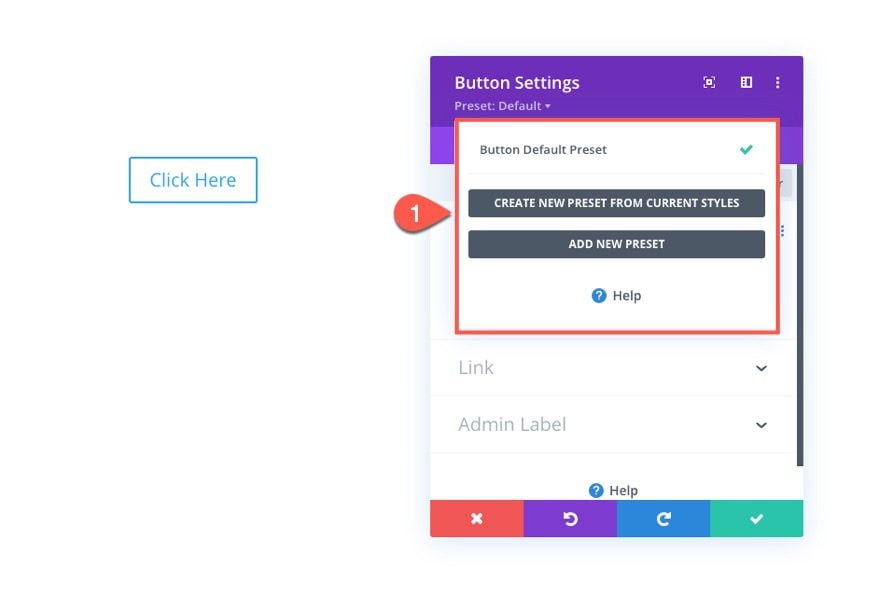
You can update the existing preset (Default) by choosing the. “Create New Preset from Current style” and turn on “Assign Preset to Default” 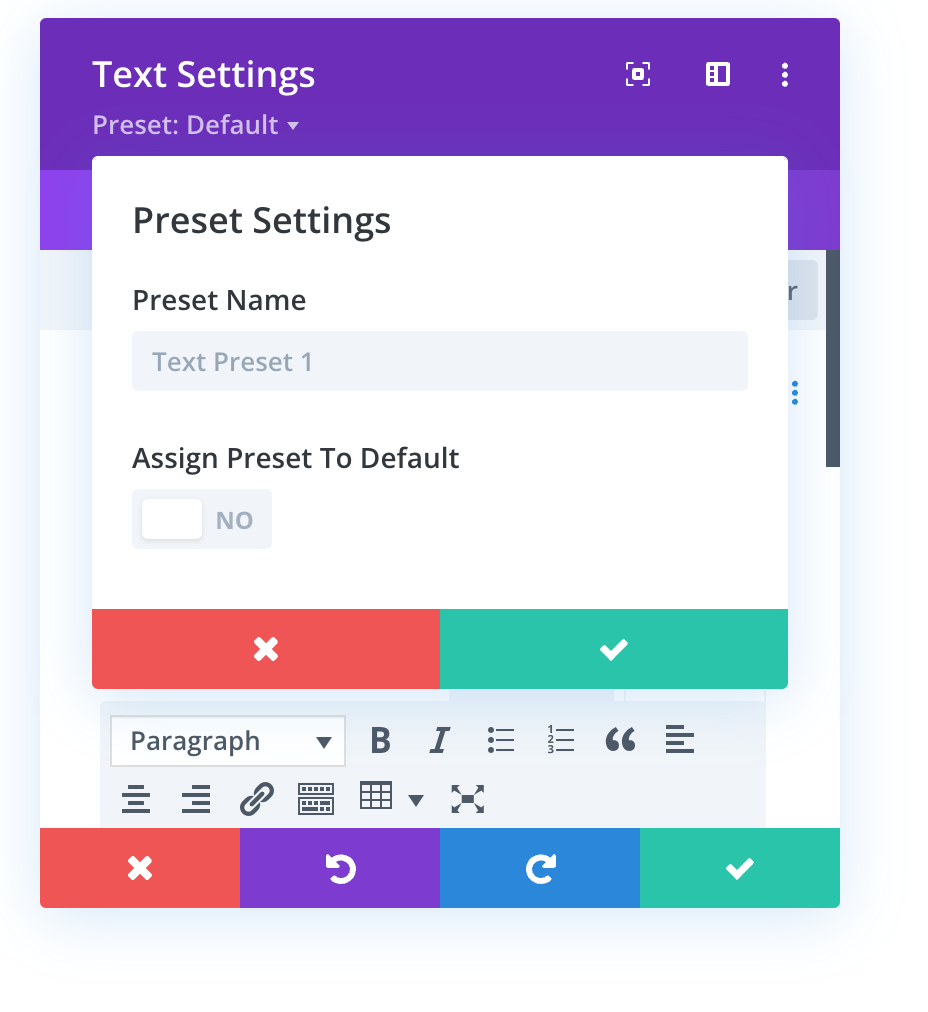
Another way to do it is to right click the three dots on the right, and choose “Apply Styles to Active Preset”

Repeat Steps for Each Module You Want to Include in Presets
Repeat these steps for each preset you want to create.
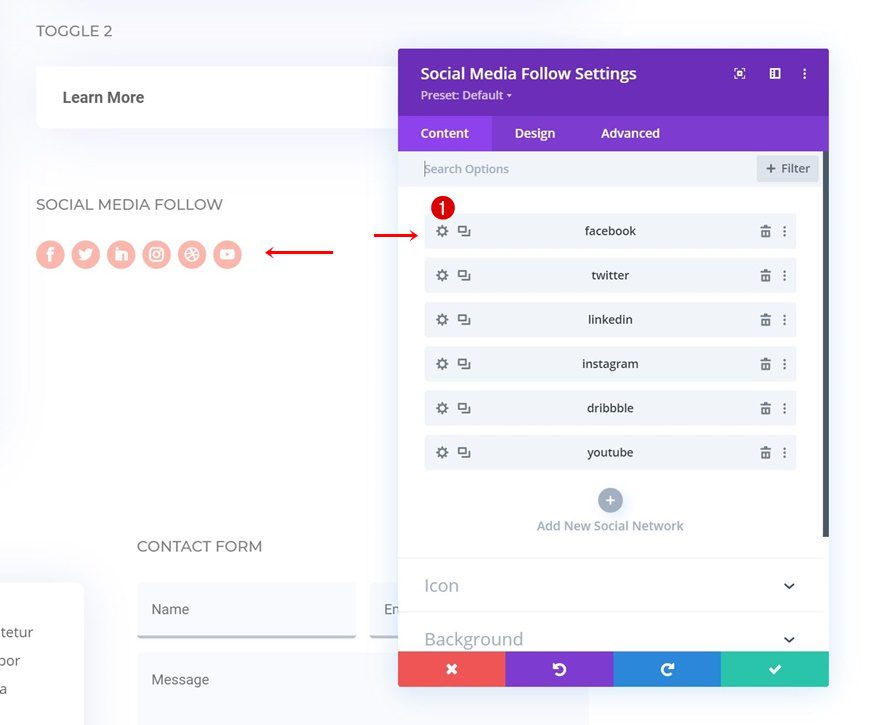
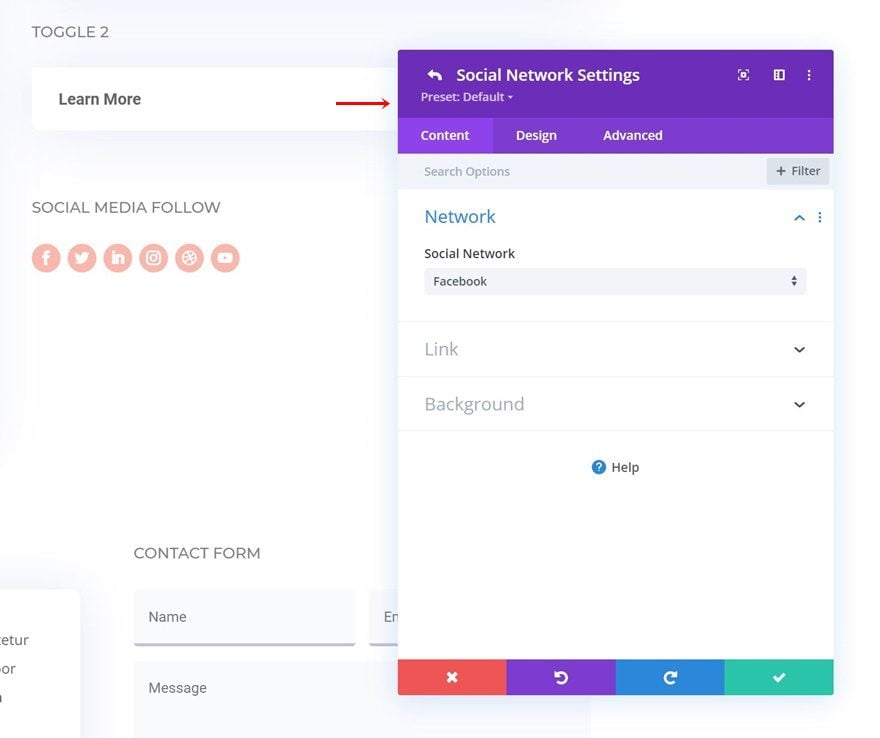
Exception: Nested Modules (Social Media Follow Module)
For nested modules, such as the Social Media Follow Module, you’ll need to open the item inside the module and save that element as a new preset too.
How to Turn Layout Pack Styles into Global Defaults with Divi (without Global Setting Style Guide)
To turn your module into global default without using the Global Setting style guide, follow this official Divi Tutorial:
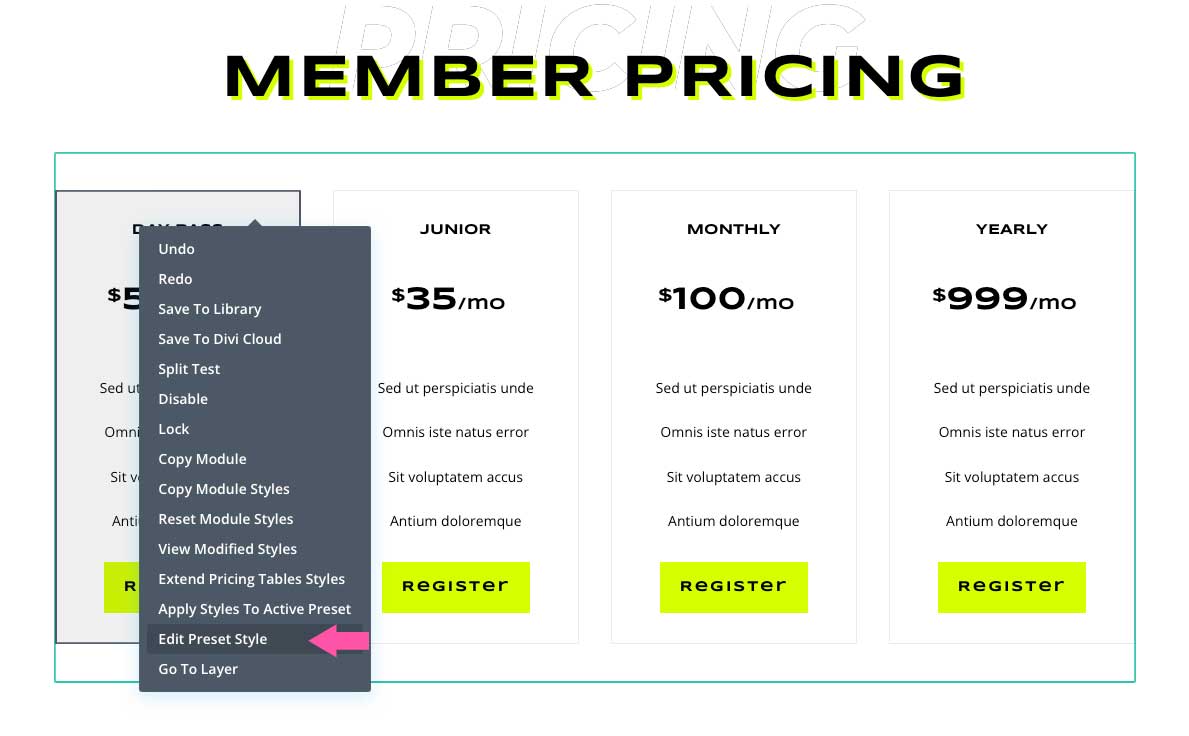
Overriding Divi Preset Styles
If you need to override a preset’s style, you can use Divi’s right click options to do it. Hover over the module or element that you’d like to edit, then right click to reveal the menu. Click Edit Preset Style. The module’s options will appear allowing you to make design changes to that singular module. Once your changes are made, simply save it by clicking the green check box.
05
Troubleshooting
How to Fix the “Sorry, This File Type Is Not Permitted for Security Reasons” Error in WordPress
If you’ve tried to upload a file to your media library and received the “Sorry, this file type is not permitted for security reasons” error, you may feel stumped as to how to proceed. Fortunately, there are several ways to fix the error, and get things back to normal.
Please follow this instruction from Elegant Theme
I GET 'NO RESULTS FOUND' WHERE I SHOULD HAVE BLOG POSTS
My Blog lay out is not showing
If you have allocated Posts to your blog page, that will override your Divi page layout.